Design Phase
Research
In 2022, we consulted with the client to understand their challenges and vision, which was to create a platform that helps people decide where to meet. After identifying their needs, we conducted a competitor analysis and discovered two similar apps: Yelp and OpenTable.

We identified two main weaknesses in these platforms: first, they focus solely on restaurants and cafes; second, they fail to help users find accessible and equitable meetup locations for groups. Based on this research, it’s important to emphasize that Astral is not merely a restaurant or cafe finder app. Instead, Astral enables people to discover accessible and equitable meetup locations suitable for multiple individuals.
Design Decisions
Before building the app, we should create a feature list. These are the features we have developed:
- Sign In
- Sign Up
- Onboarding Flow
- Invite Friend to the Platform
- Find a Place for the User
- Find a Place for the User’s Group
- Category Page
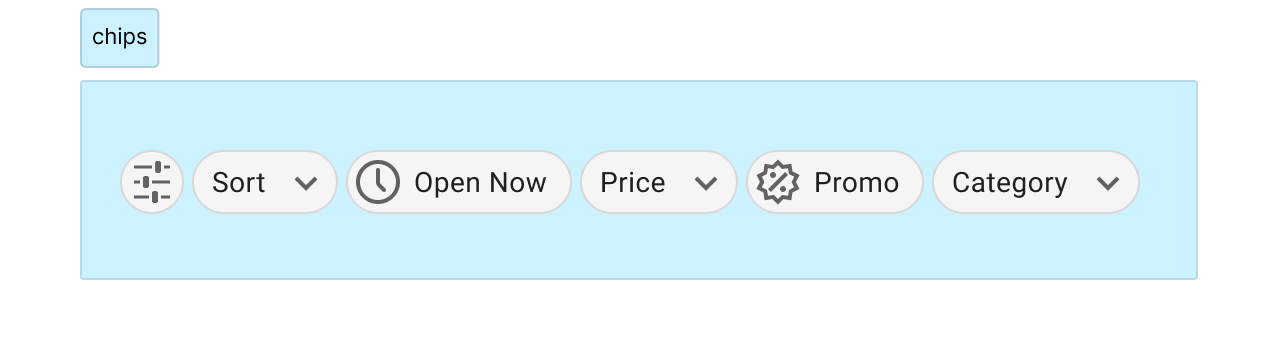
- Filter the Place List
- Location Detail Page
- Settings Page
- Etc.
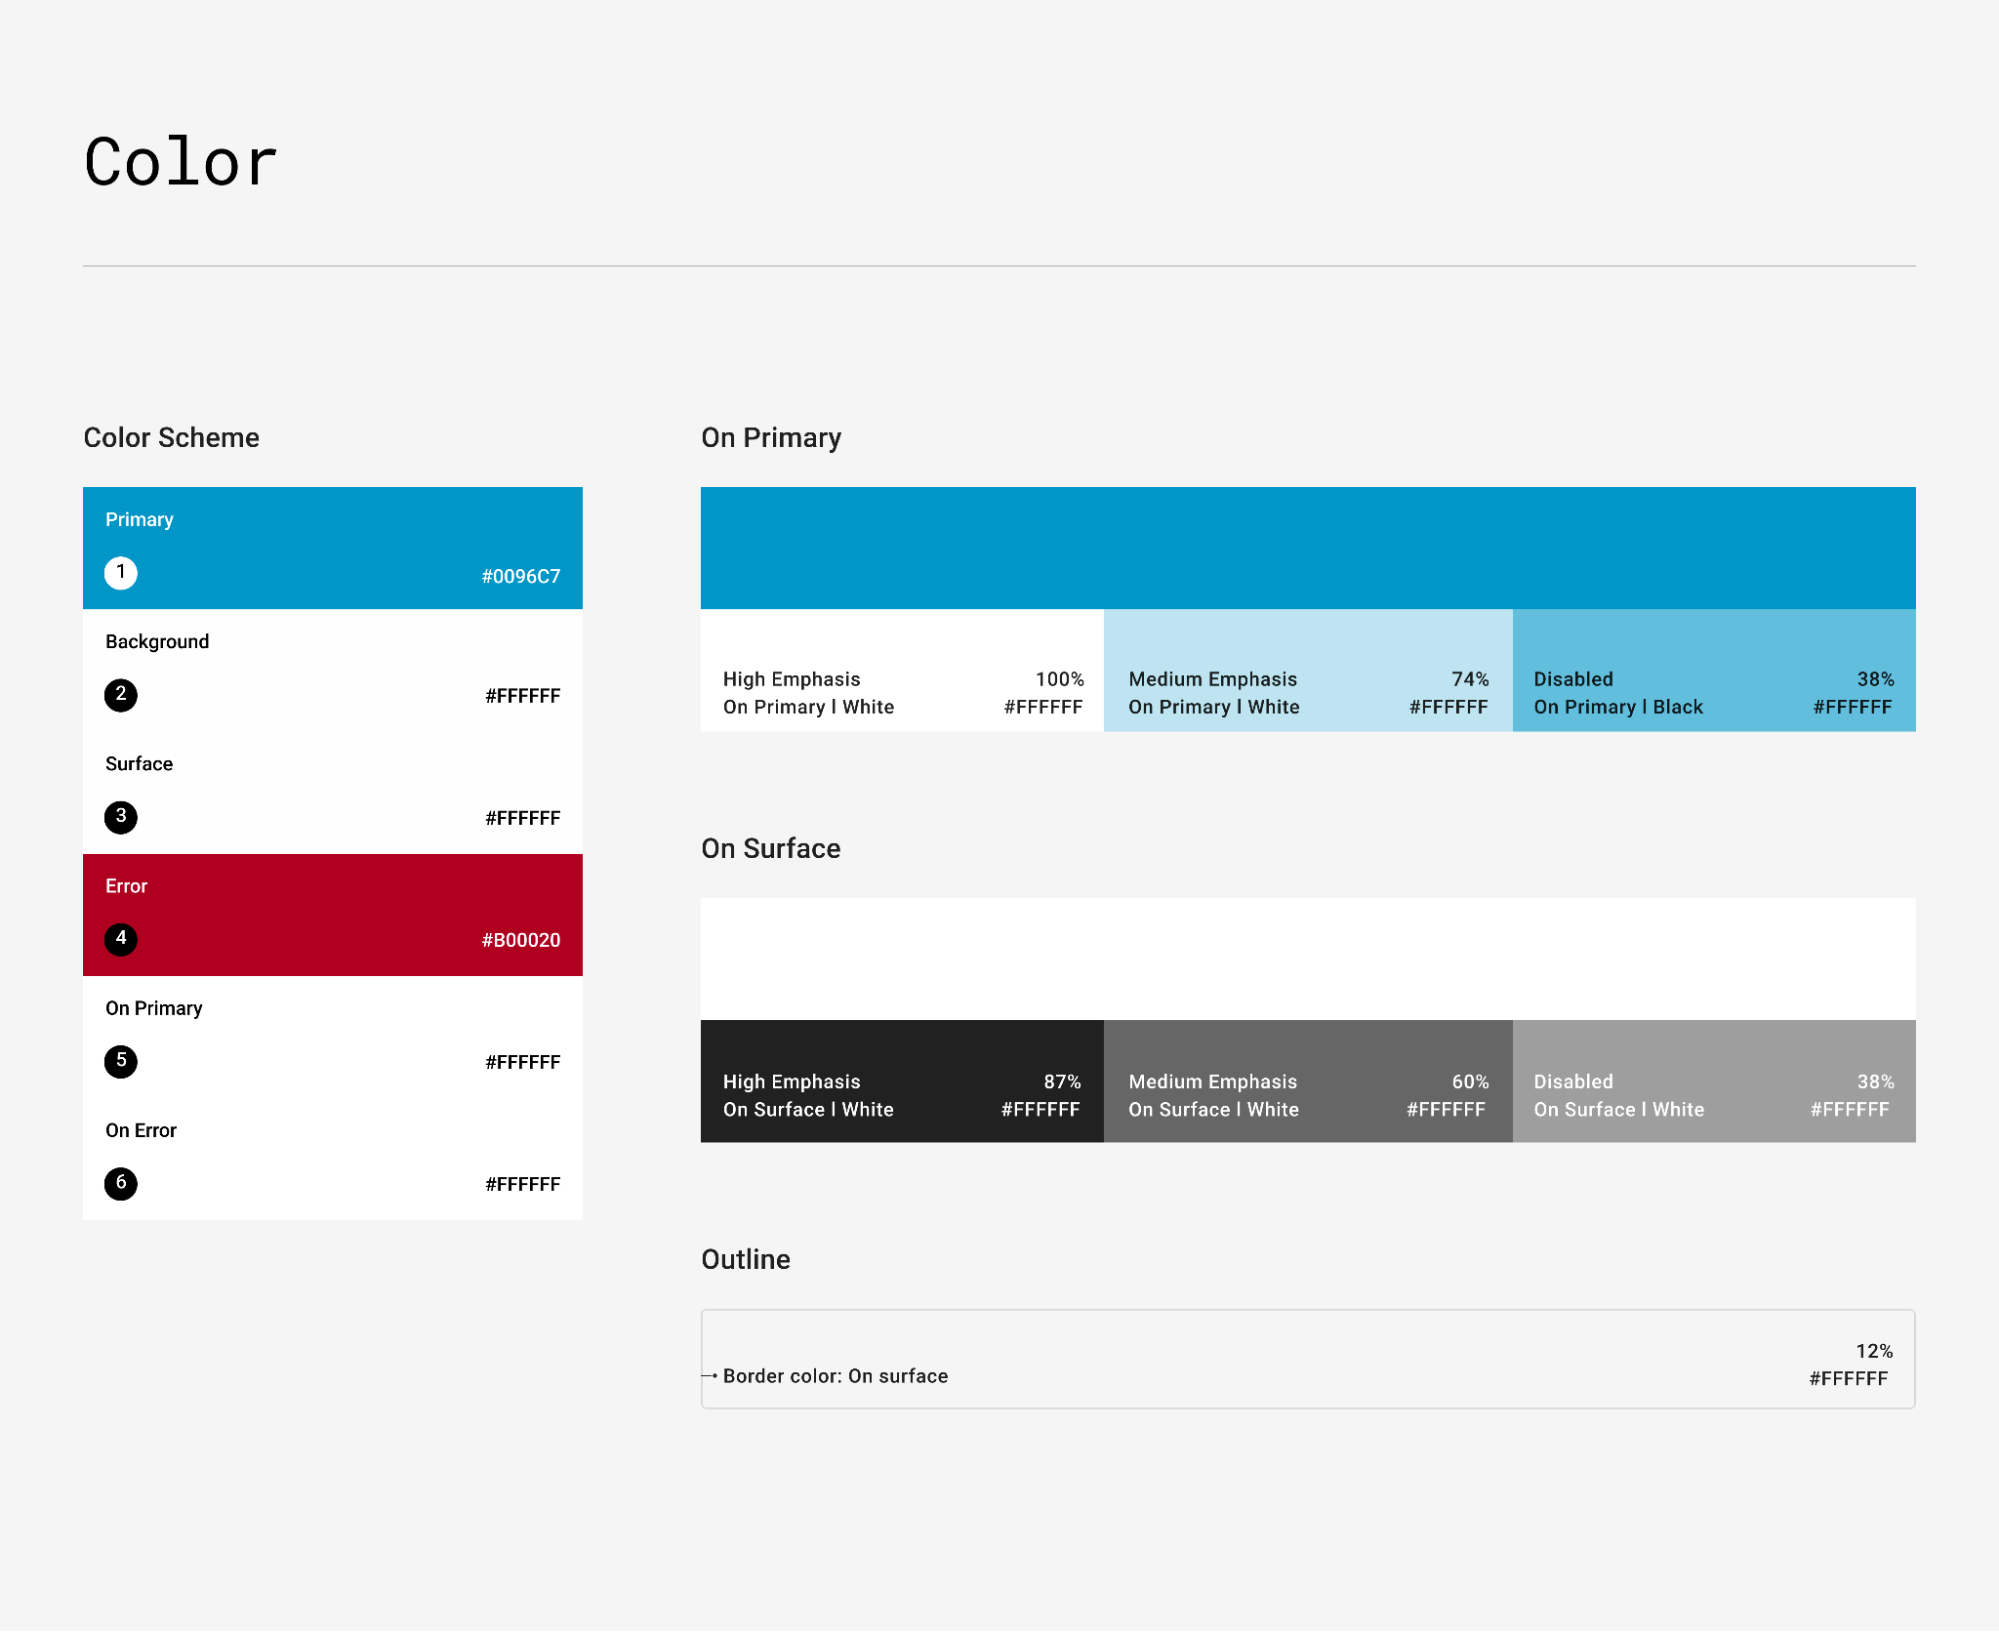
The first step we took was to create a design system, which is a set of standards that manages design at scale by reducing redundancy, creating a shared language, and ensuring visual consistency across different pages and channels (source: nngroup.com). For the Astral app, we are using Google’s Material Design structure to develop Astral’s design system.


After designing the design system, we started the design process.
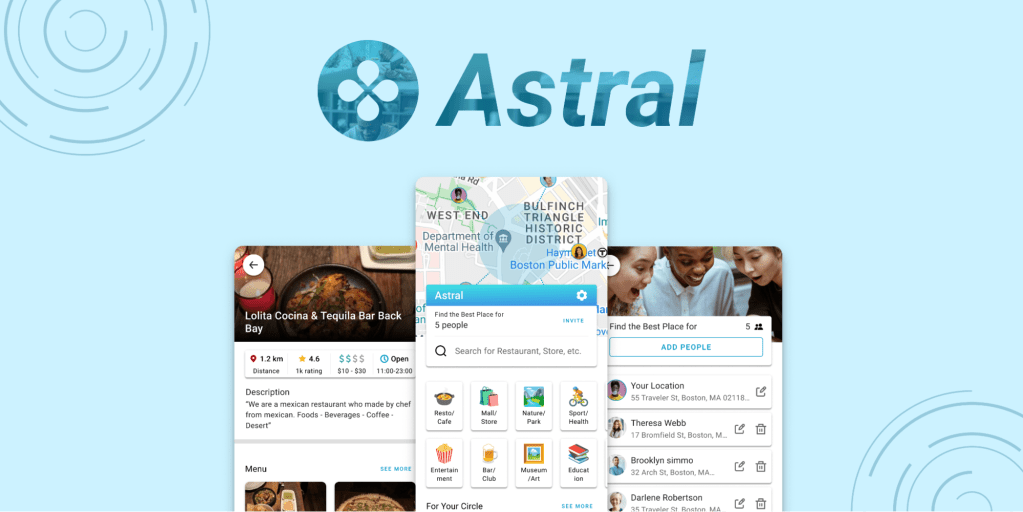
| Homepage | Part of the Page | Design Reasoning |
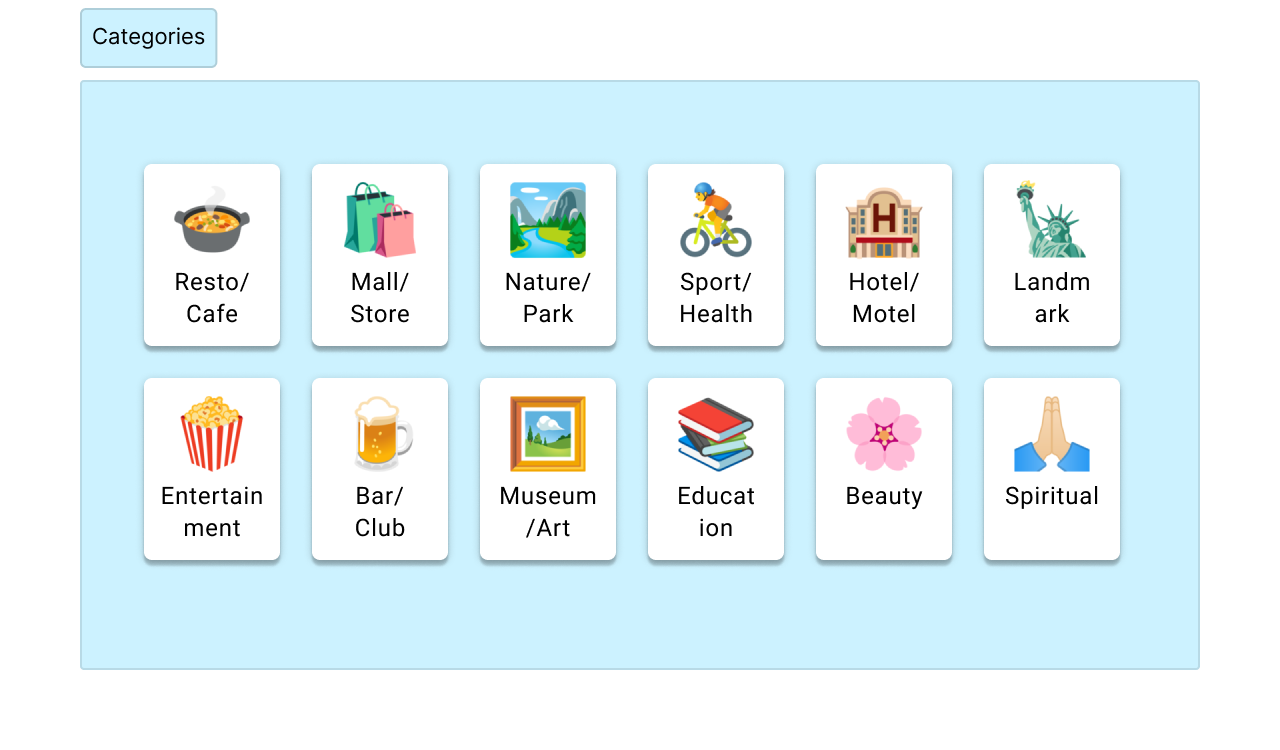
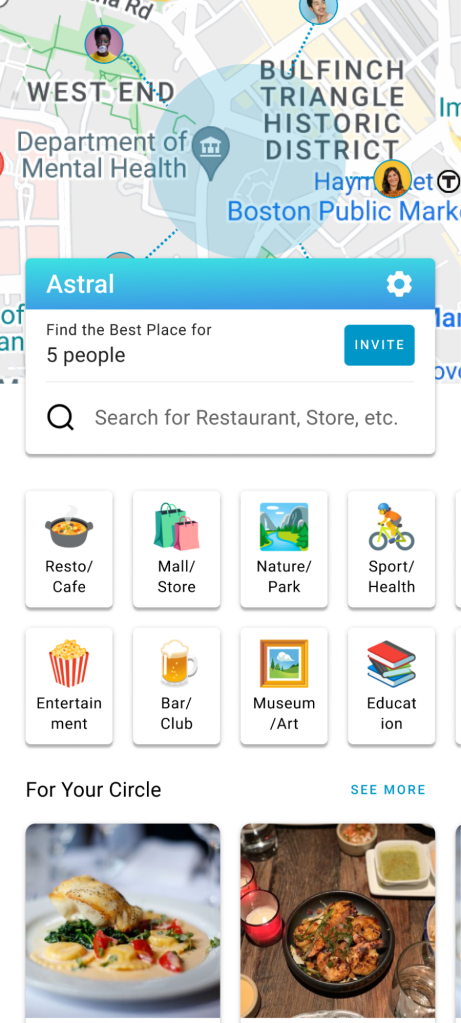
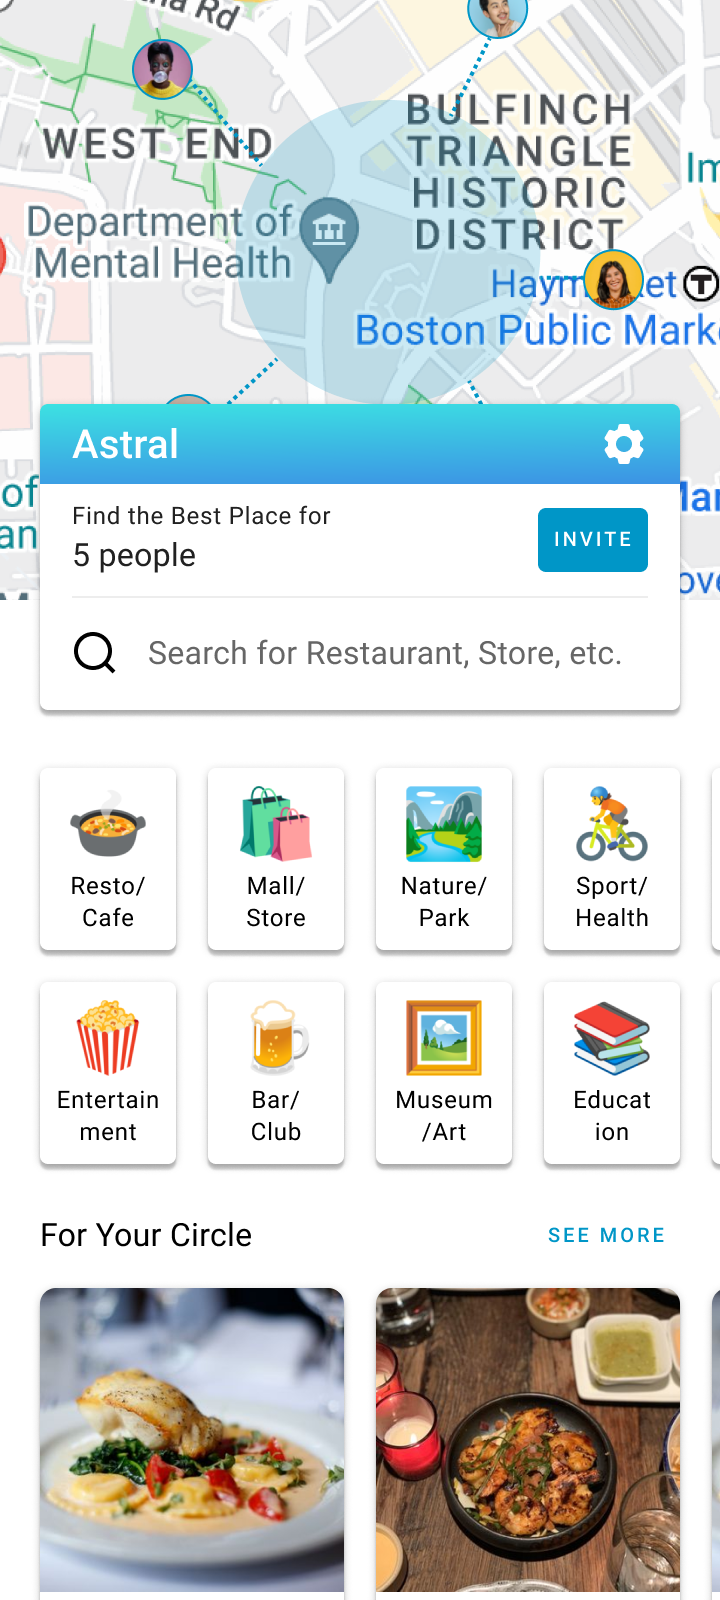 | 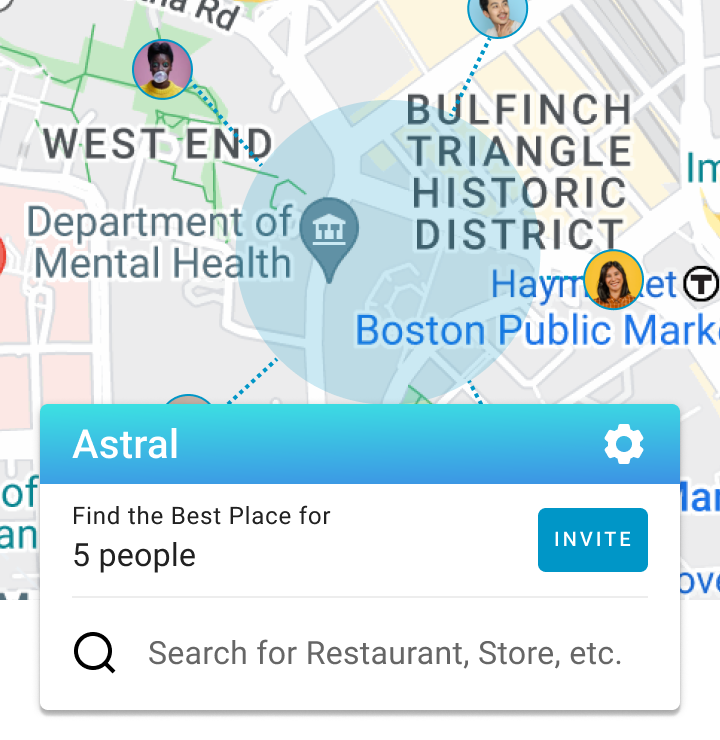 | Highlight the main feature of the product, which allows users to find accessible and equitable places to meet up. |
| Inform the user that they can find many types of places, making it more than just a restaurant finder. |
| Invite People Page | Part of the Page | Design Reasoning |
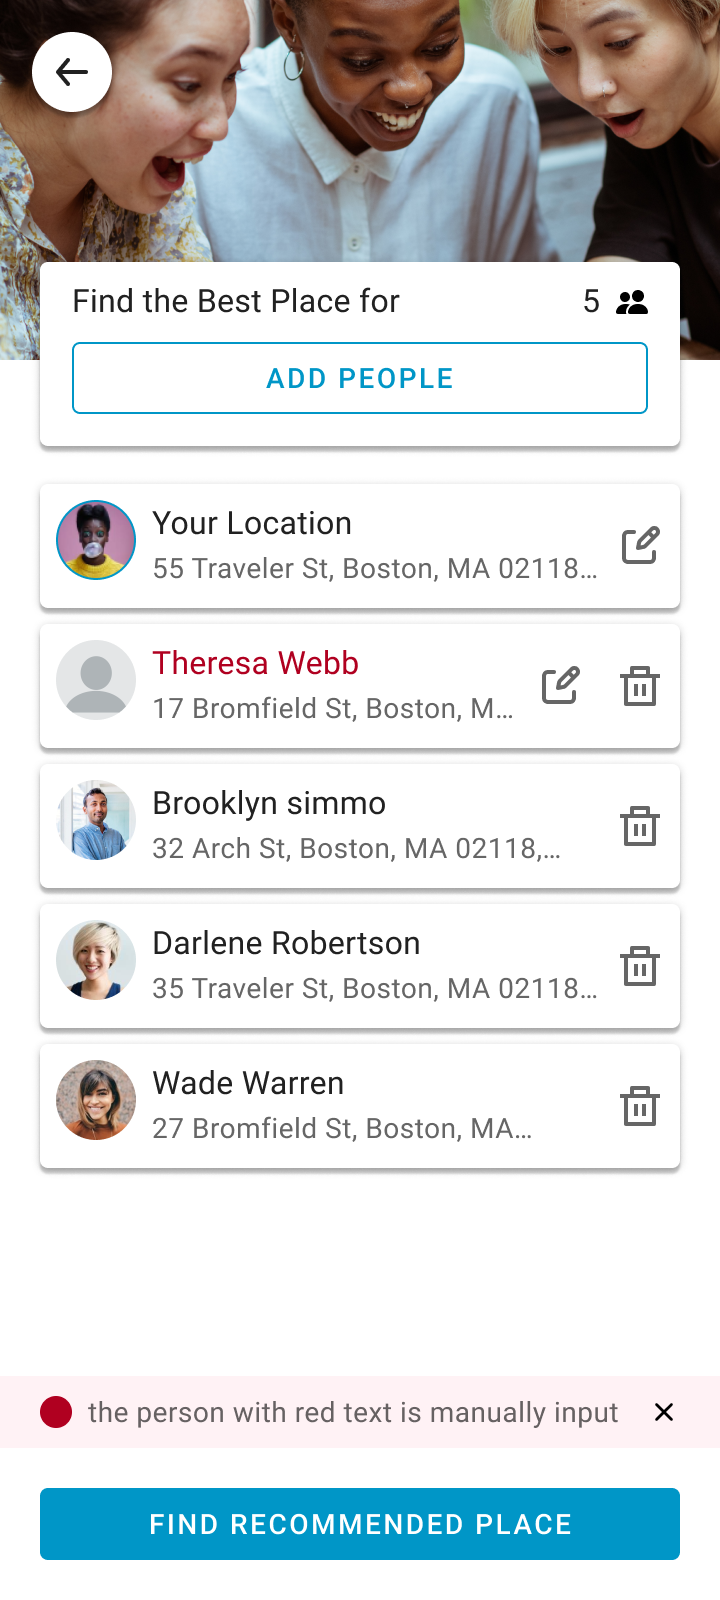 |  | Users can add another person from their friend list, where locations are updated automatically, or through manual input, where users must enter the location themselves. Manual input is necessary because Astral is a new product and currently has no users. |
 | The list of invited people will help users review where everyone is traveling from. | |
 | Help the user notice that the name in red was input manually. |
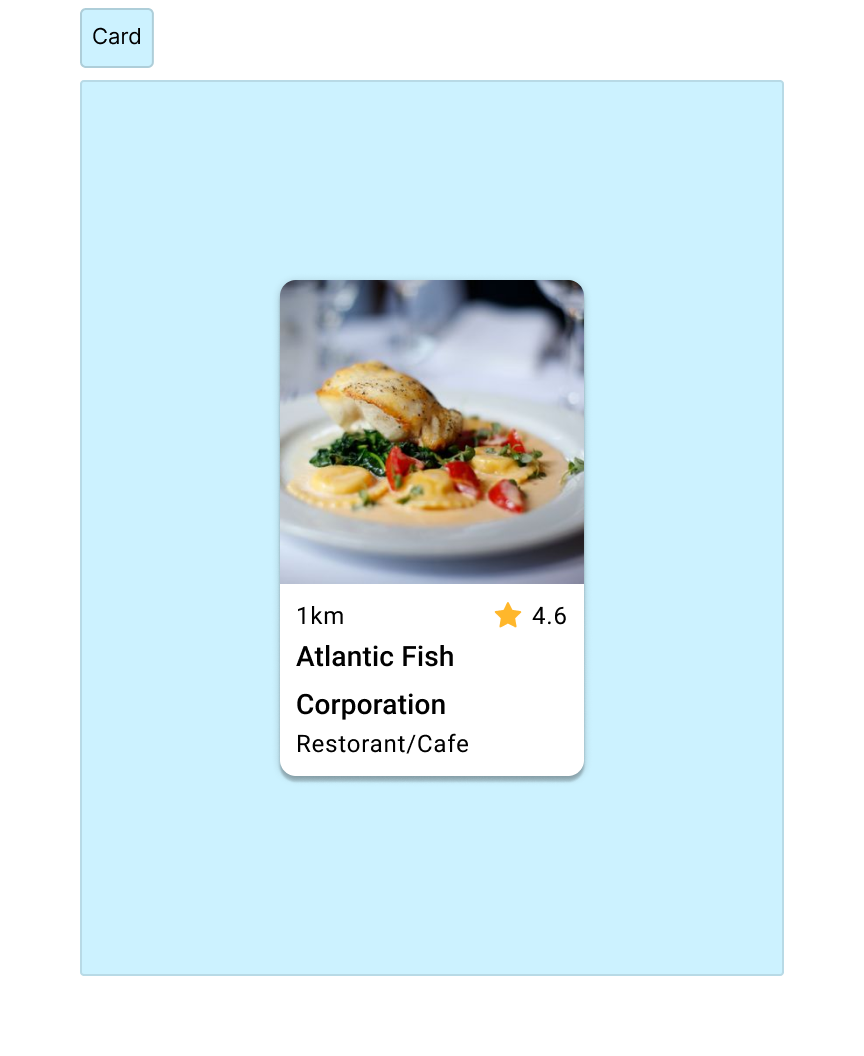
| Place Detail Page | Part of page | Design Reasoning |
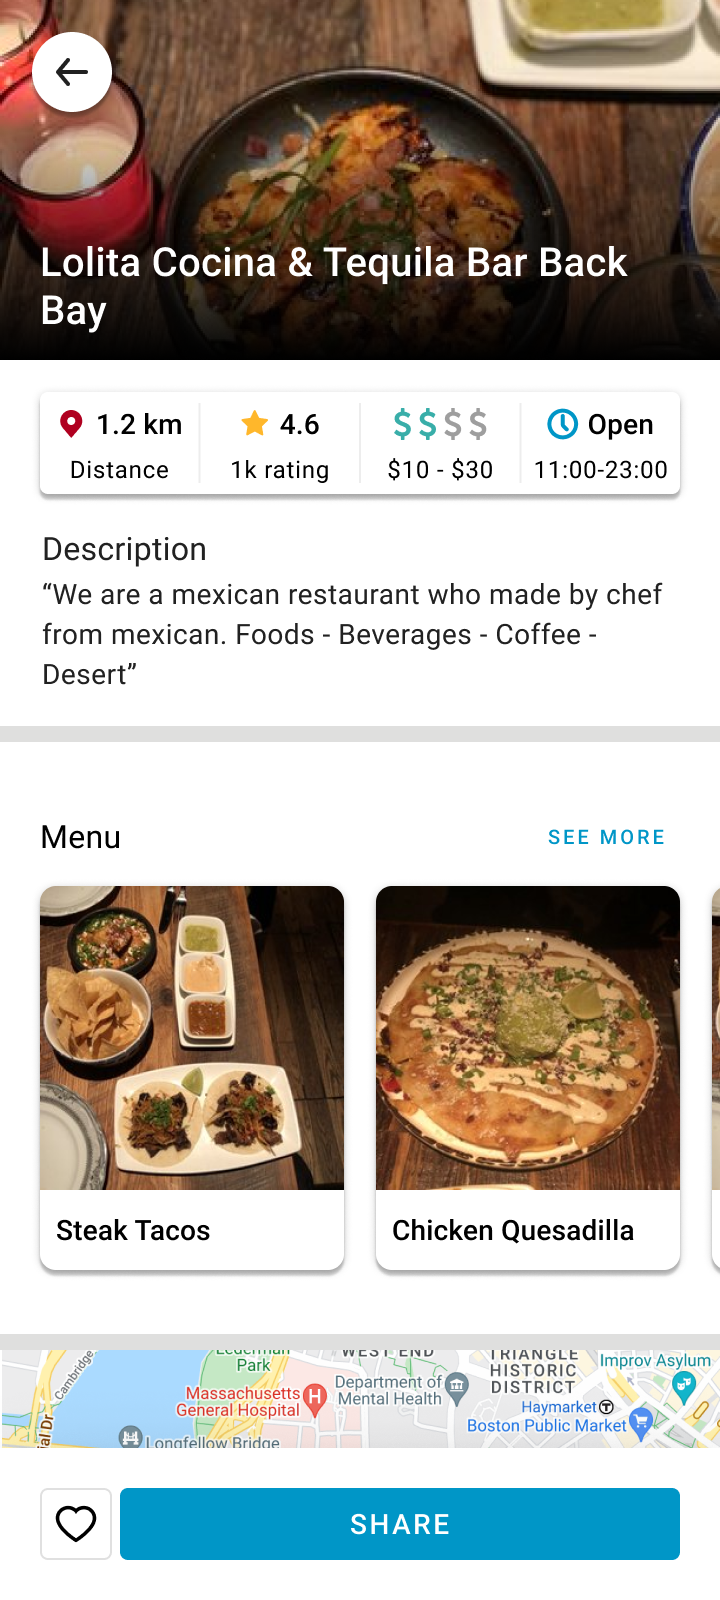 |  | We placed the main information at the top of the page so users can make decisions faster. |
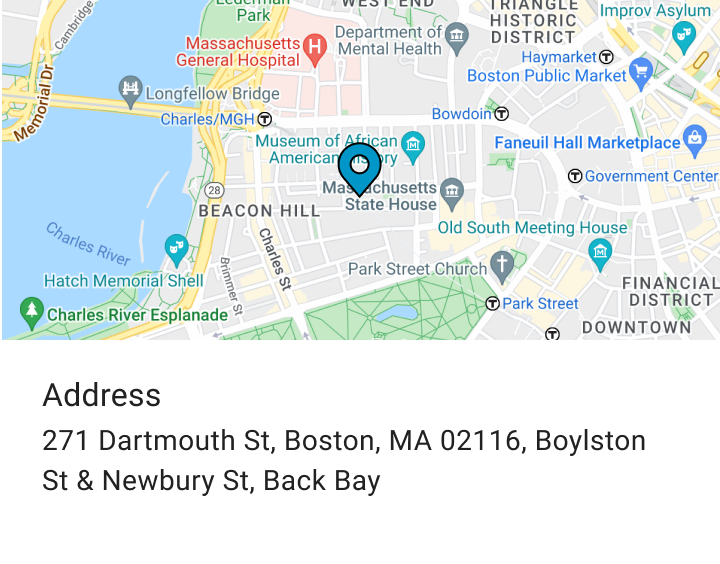 | After the user clicks it, it will direct them to the map app, allowing them to estimate their route to the location. | |
 | The main button is always at the bottom of the screen for easy thumb access. Users can press ‘love’ to add a location to their wishlist or ‘share’ to send the location to someone they want to meet. |
Development Phase
We brainstorm the development plan, detailing our tasks and those of others to ensure everything aligns with our timeline and deliverables. Regarding tools, we build everything using technologies our engineers are familiar with. We use React Native for mobile development, Fastify for the backend, Firebase Functions for server management, and Firebase Firestore for our database.
Step 1: Setup the Entire Project
We will need to separately set up the steps for the backend and the frontend (mobile).
Setup Backend Project:
Initialize the Node.js Project:
mkdir AstralProject
cd AstralProject
mkdir AstralProject-Backend
cd AstralProject-Backend
The next step is to set up the project structure as follows:
└── AstralProject-Backend/ (deployment workspace)
└── functions/ (root project)
└── src (our workspace)
Setup Mobile Project:
First, we need to initialize the React Native project by running the following command:
mkdir AstralProject
npx react-native@latest init AstralProject-App
Then, you will have the React Native project ready for development.
Setup Firebase:
1. Create a Firebase Account:
First, if you haven’t already, you need to sign up for Firebase. Visit the Firebase website and sign in using your Google account.
2. Add a Project:
In the Firebase console, click on ‘Add project’ and follow the prompts. Enter the name of the project.
3. Register App:
Select ‘web’ when registering the app. After completing the registration, you can download the google-services.json file. We will need this file later for the backend setup.
Step 2: Backend Development
We will begin backend development by initializing the project structure in the backend workspace. We need to adhere to this project structure because we are using Firebase functions as the cloud hosting server:
└── AstralProject-Backend/ (deployment workspace)
└── functions/ (root project)
└── src (our workspace)
After that, we can begin to initialize the backend code.
We designed our database structure to meet the needs of our features. As we are using Firebase Firestore as our primary database, it was necessary to adopt a key-document format, which differs from traditional relational databases. Additionally, some database read and write operations are performed on the frontend, governed by secure, specific rules.
Integration
For the backend, we integrate with several third-party services. These include:
- Twilio:
We use Twilio to enable SMS invitation features, allowing users to invite friends to use Astral via SMS. - Yelp:
We utilize Yelp to identify recommended locations. - Google Services:
We employ Google services for our maps and geolocation calculations. - Firebase Firestore:
Some database operations are exclusively performed server-side to validate user-submitted data and prevent malicious attempts against our system.
How We Found an Equidistant Meeting Place
We calculate the center point of your group users by using the midpoint and Euclidean distance formulas as follows.

We then search for recommended places near that point, based on your favorite categories.
Step 3: Mobile Development
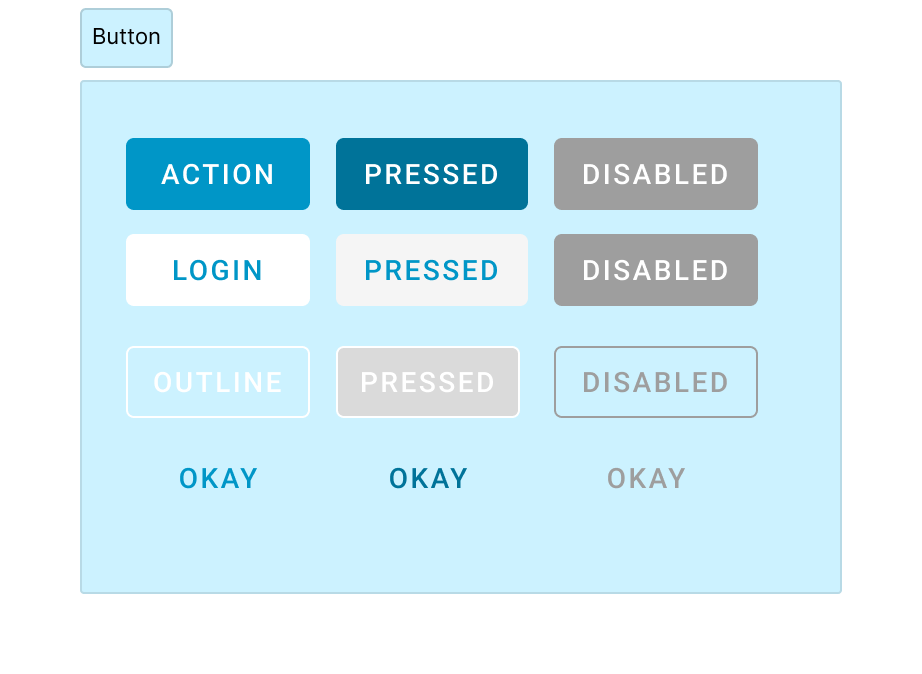
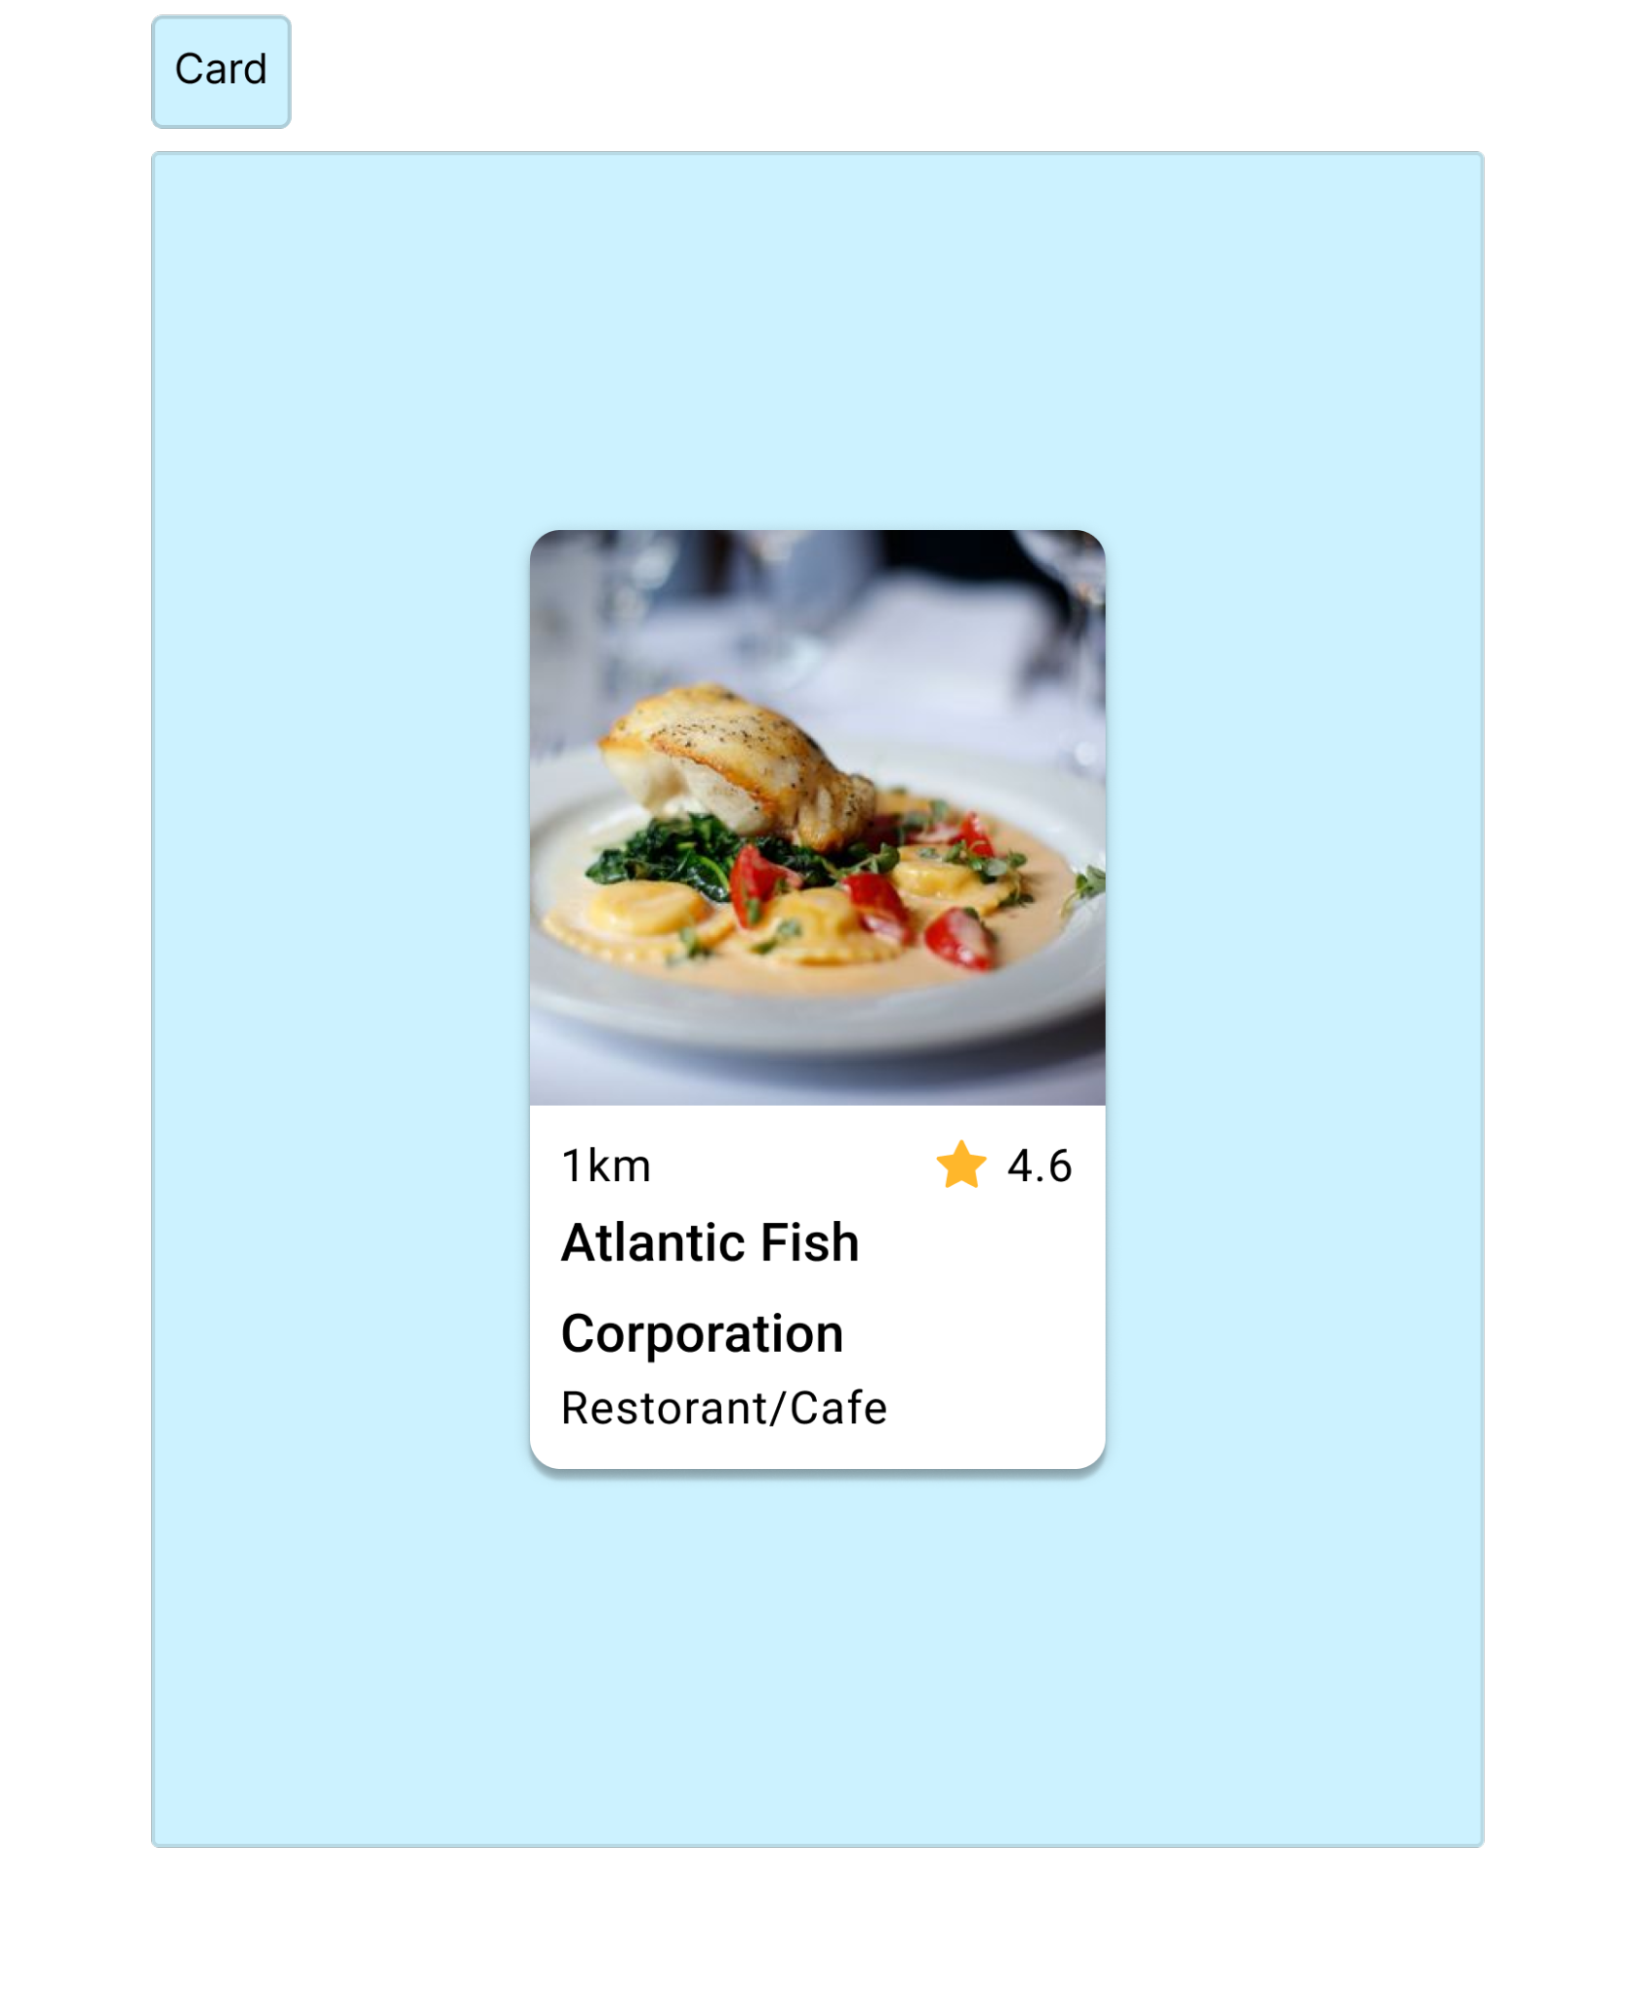
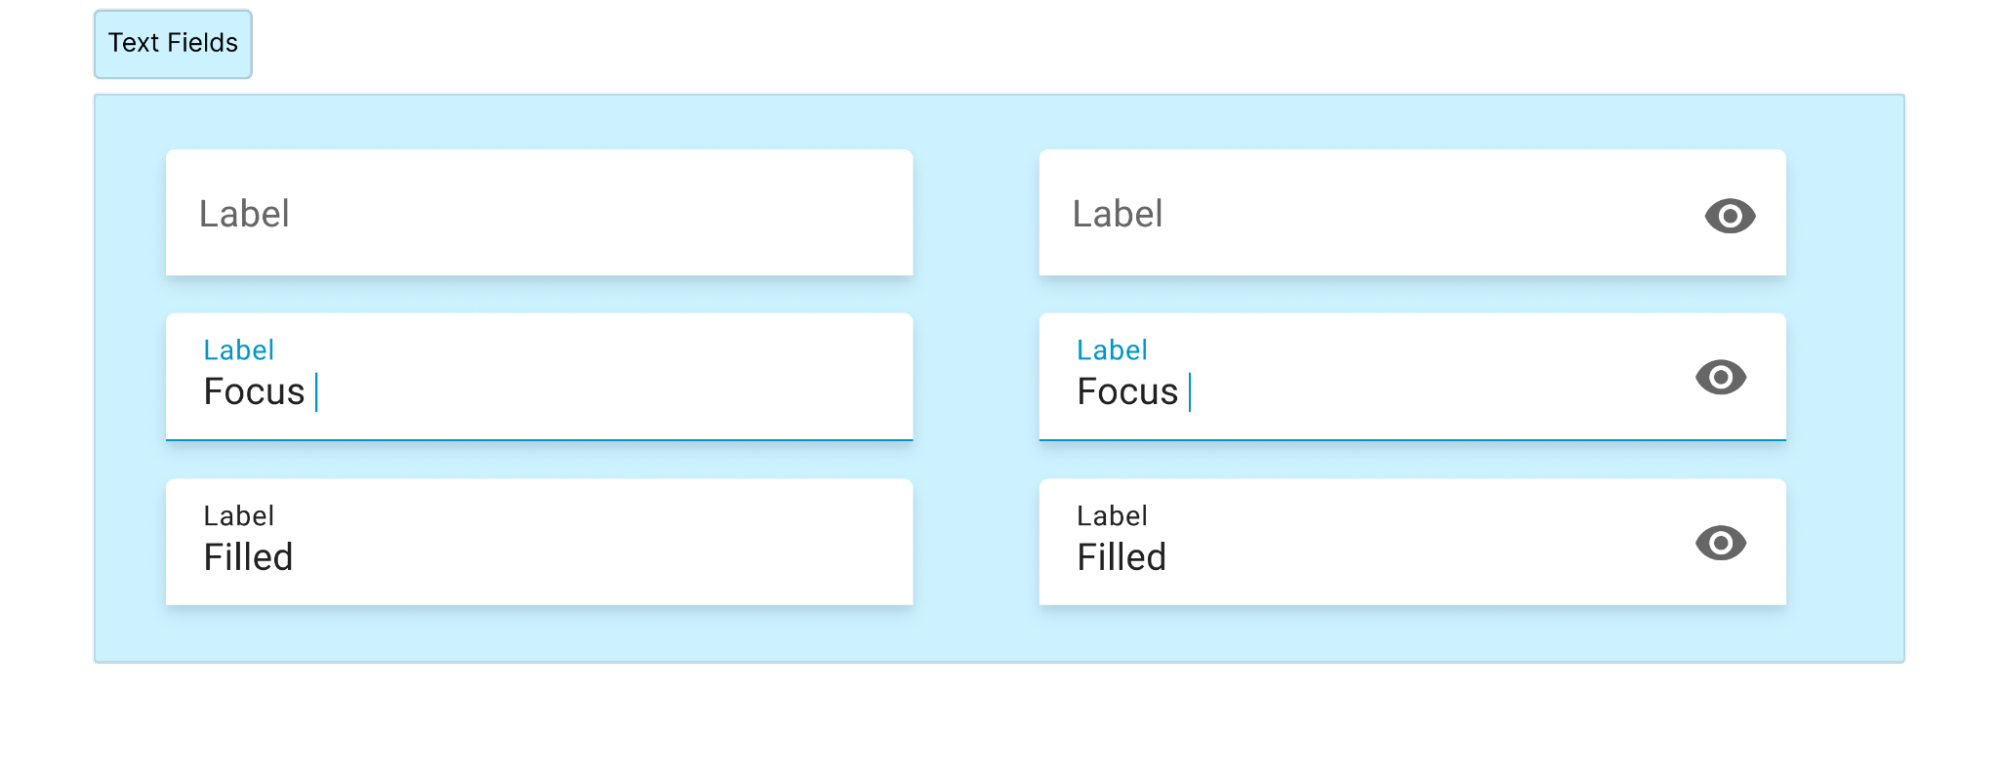
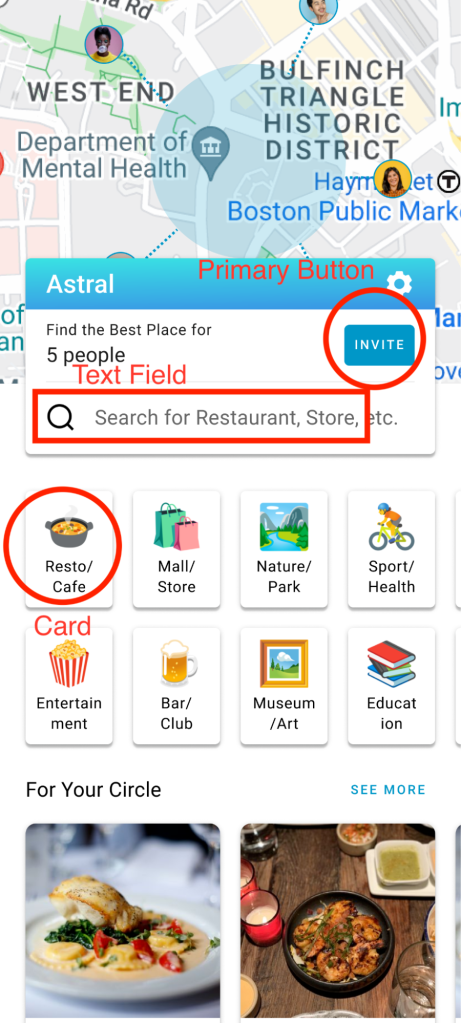
First, we begin by creating our design system components using the Atomic Design Pattern. We start with our atoms, such as Buttons, Text Fields, Cards, etc.
Creating Design System

 |  |  |
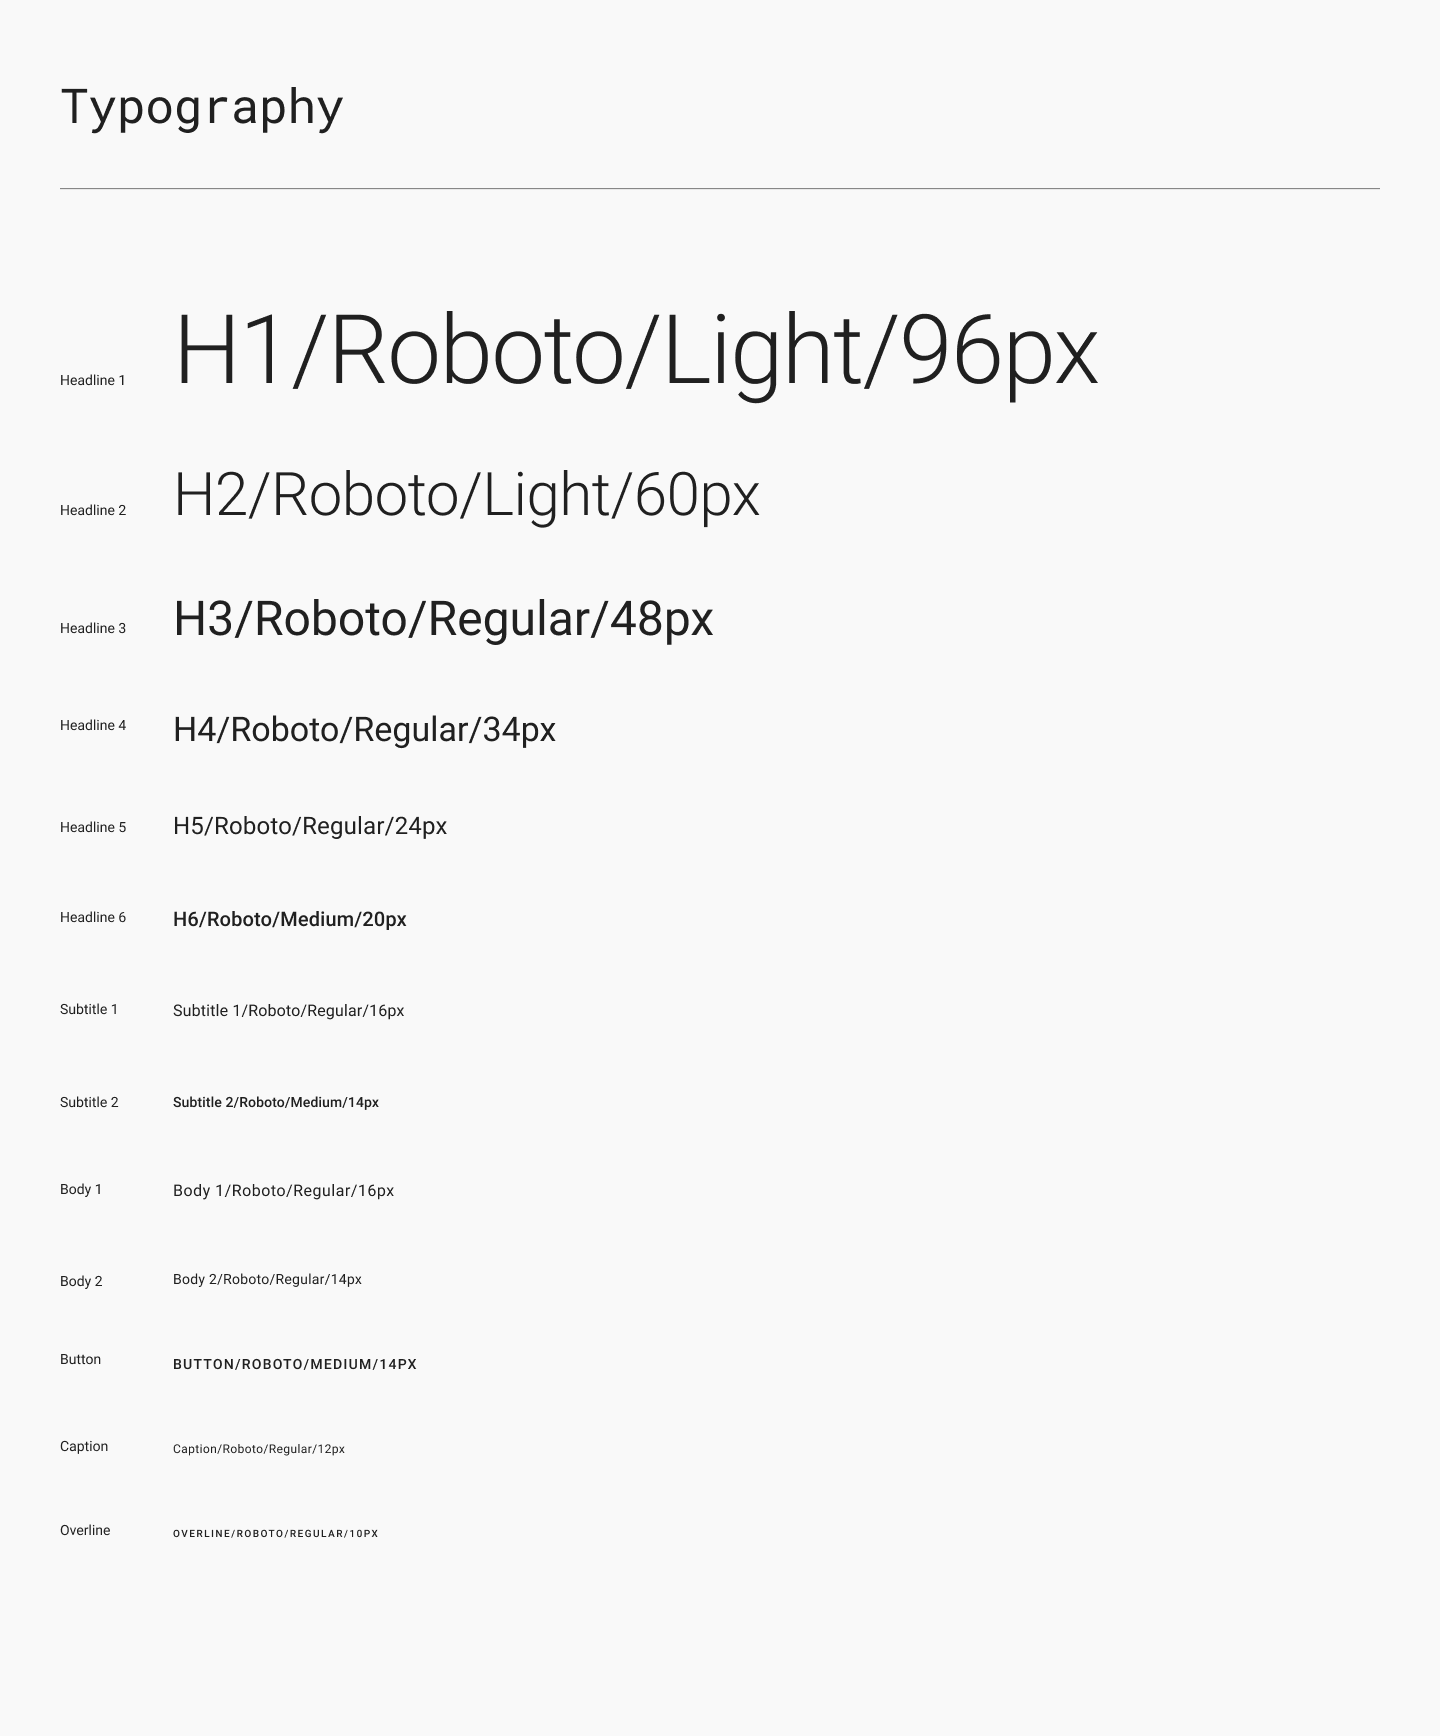
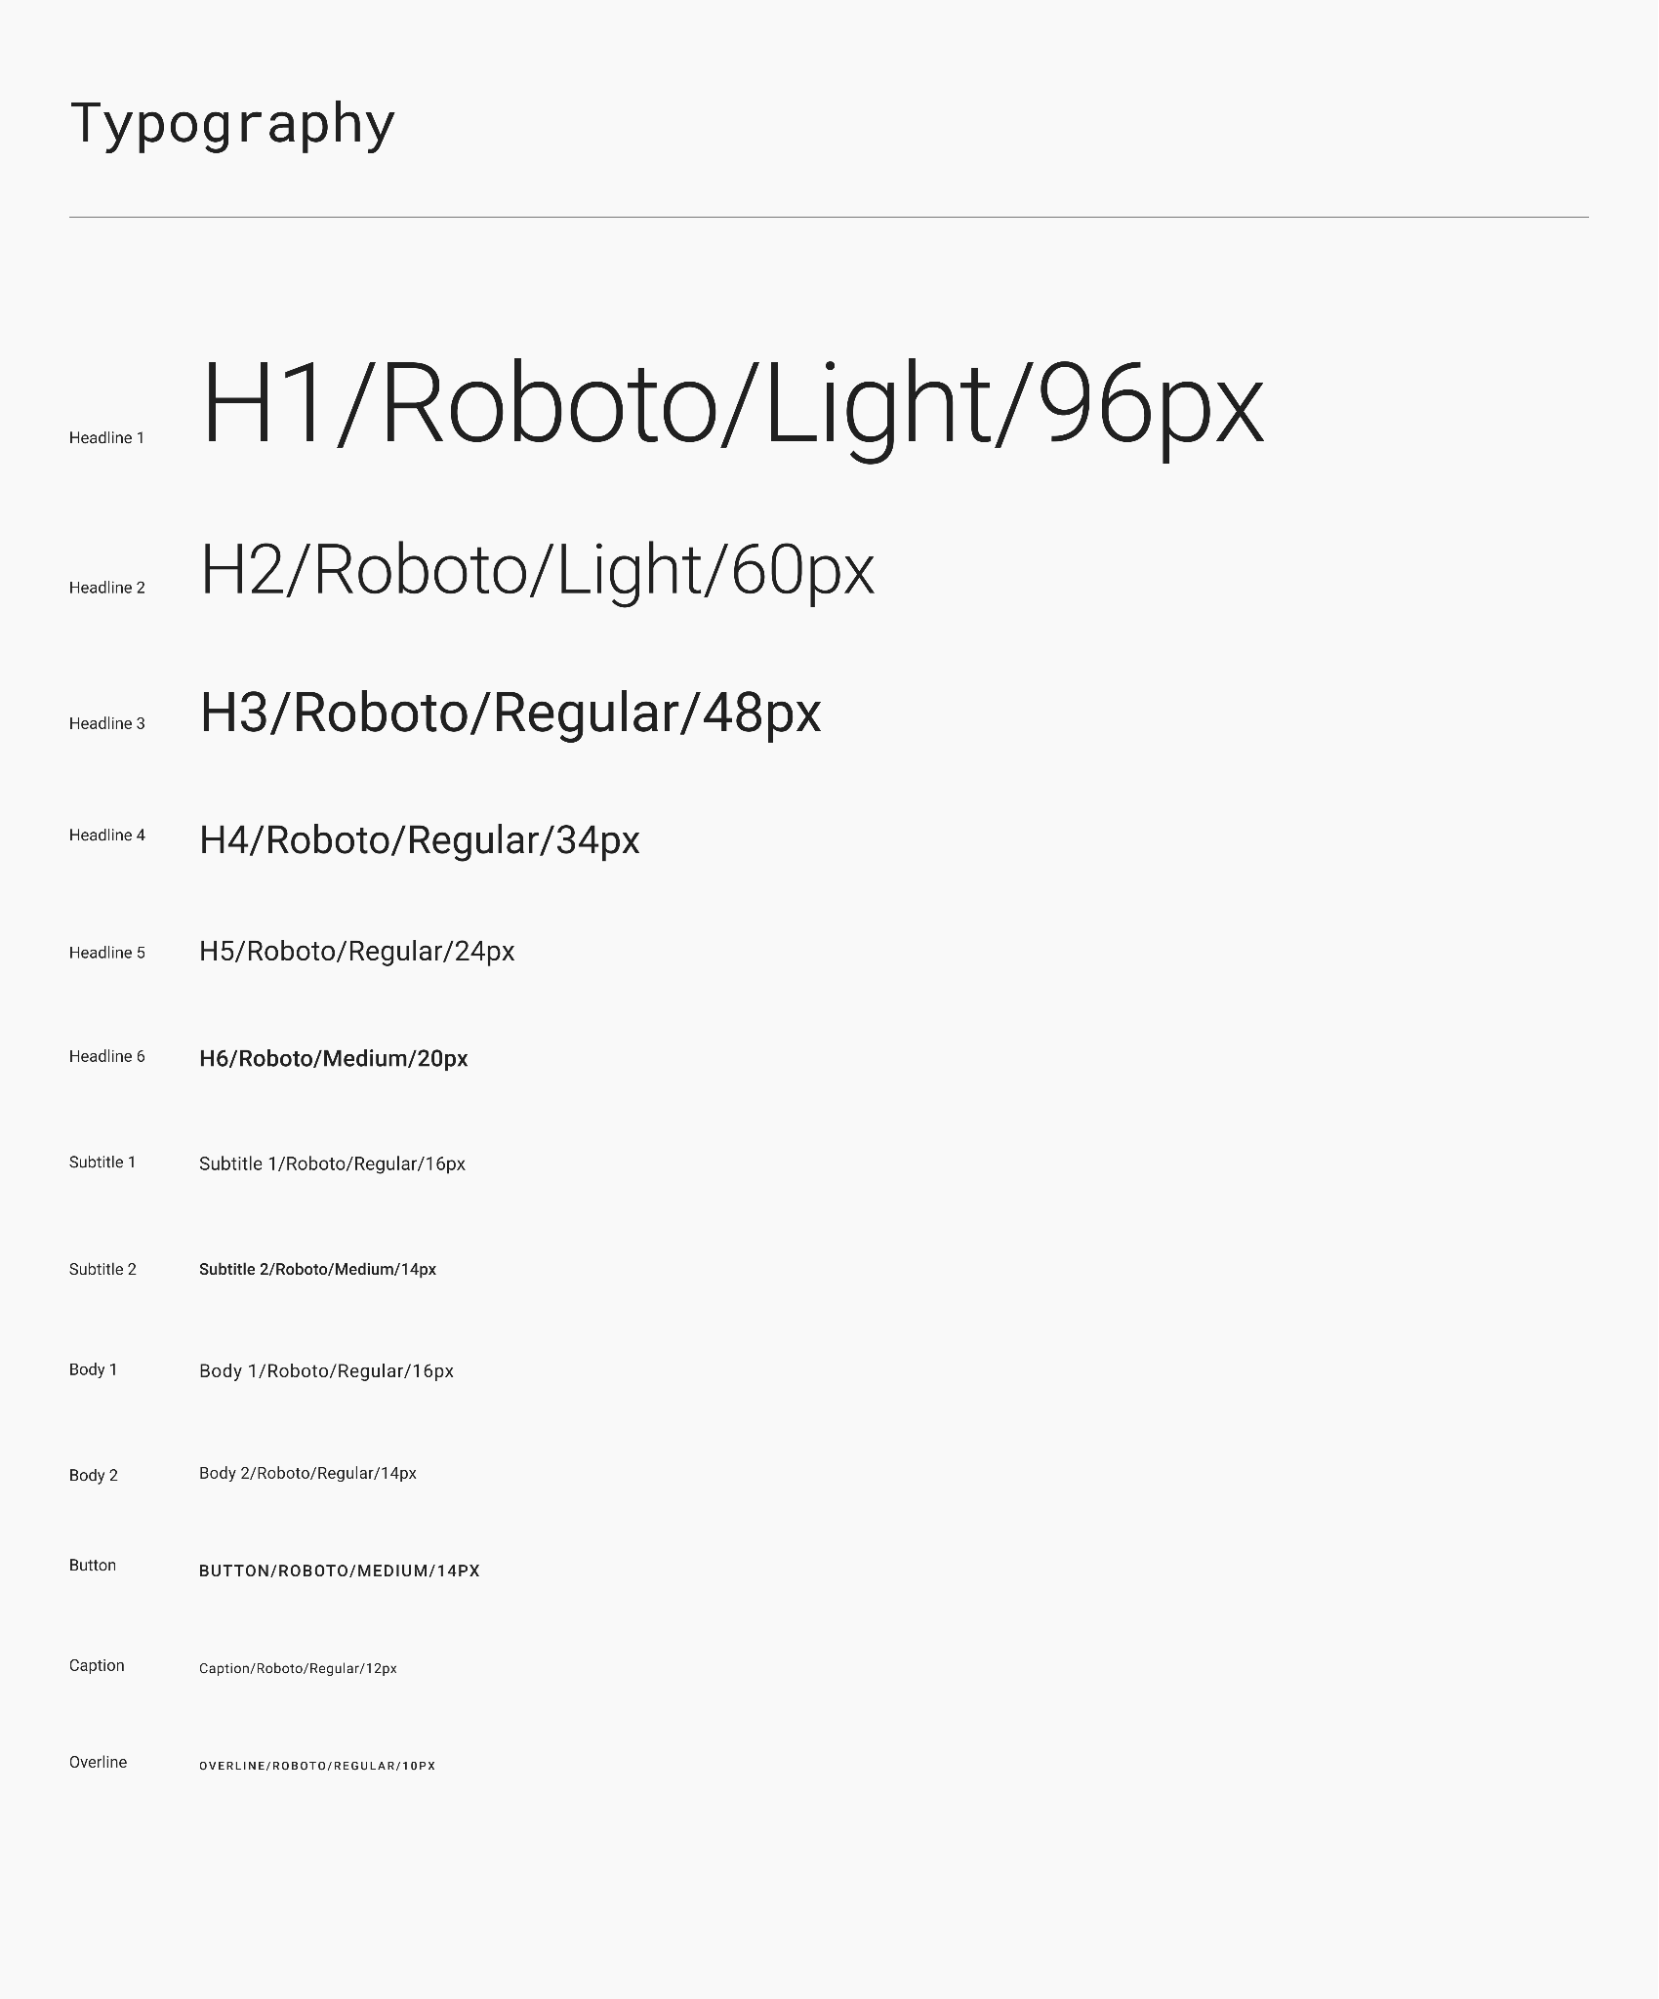
We also begin development by defining our brand colors and the typography styles we plan to use.
 |  |
After creating the design system, we began developing high-fidelity (HiFi) screens in Figma. Using reusable components from the previous step has speed up the development process.
Here is an example of how we developed one of the home screens:
We define each component as a micro component:
Use case 1
By defining each component, we can track which ones are already created and which ones are not. For example, our existing card components do not include an icon at the top, indicating that we need to add a property to the card component to include the icon. This approach allows us to modify the existing Card Component rather than creating a new one, anticipating future needs for cards with top icons, even though they may not be widely used.
Use case 2

Another example is the basic Text Field, which is initially created without a search icon on the left side. By defining the component, we realize the need to add a new component called ‘Search.’ This component will incorporate the Text Field from the Atoms and include a search icon on the left side. We opted to create a new component rather than modifying the existing one to avoid bloating the code, as the Search component has numerous use cases.
Backend Integration
After completing the slicing of the HiFi design, we began working on the functionality of each component and integrating it with our backend.
We use Axios as our library to facilitate integration between the API and the mobile screens. An important step in this process is separating the directories for API logic and business logic because we believe each type of logic should have its own distinct responsibilities.
Step 4: Build and Deploy
The deployment was divided into two parts: backend and mobile.
Backend
We use Firebase functions to serve our backend server, allowing us to deploy our code to the live backend using the Firebase CLI. The project can be deployed with a single command (firebase deploy --only functions). Google ensures the app is deployed live with zero downtime.
Mobile
The setup and building processes for Android and iOS apps are completely different.
- Android
Building an Android app for production involves signing the app with a fingerprint key, which identifies us as the legitimate publisher. This key can be created within Android Studio. After setting the release app version number, we build the app. For our React Native app, we simply runyarn androidto build it. - iOS
Similarly, in iOS, we also need to sign our app, but the signing process is automated during the Apple TestFlight stage. To build an iOS app, we simply runyarn iosfrom the command line.
Step 5: Publish the App
We are releasing our Android app on the Google Play Store and our iOS app on the Apple App Store.
Publish to Play Store
To publish an app on the Play Store, we first set up a Google Play Console account. We then complete all mandatory form checks before submitting our product, including data safety compliance, content ratings, feature declarations, and location data usage. This process, enforced by Google, ensures our app’s safety. After approval, we can customize our app’s appearance—setting the icon, cover, and description—before uploading it to the Play Store.
Before the app is released to production, it undergoes internal testing where we rigorously test and gather feedback to refine the app. Once the app is deemed ready, we attempt to roll it out to production. At this stage, the Google Play Store team reviews the app, ensuring it adheres to terms and conditions and accurately reflects our declarations before it becomes publicly available.
Publish to App Store
First, ensure you have an Apple Developer account; if not, enroll first.
Before submitting your app, use TestFlight to test it on your mobile device. This step is crucial to avoid wasting time reviewing the app on real devices after publication.
When ready to submit your app for publication, fill in the following details on the Apple Developer portal:
- Create a new app record: Provide your app’s name, description, keywords, and screenshots.
- Set up metadata: Fill in the privacy policy URL, category, and pricing information.
Once everything is ready for review, you can finalize the application review process with the following steps:
- Upload your app to App Store Connect using Xcode. Open Xcode, go to ‘Window -> Organizer’, select your archive, and click ‘Distribute App.’
- Complete the required information on encryption and export compliance in App Store Connect.
- Submit for review. Once everything is set, submit your app for review.